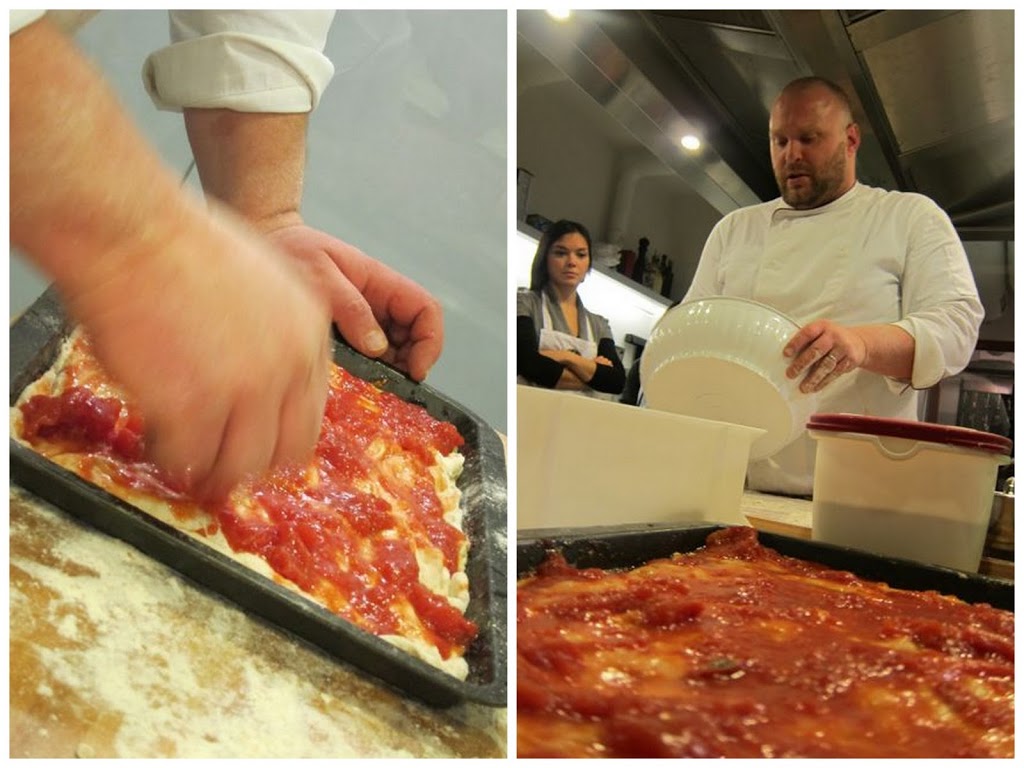
It’s been a challenge to absorb all I learned last week in my Pizza class with Gabriele Bonci. You know that the previous week I took his bread class, and wrote about it here. (These classes were held at the incredibly cool new space Tricolore, which opened in November. It’s a bakery, cooking school and they make the the most deliciously decadent sandwiches in town.)
Even though I loved every minute of my bread class, it was actually the pizza class I was really excited about. I guess this is for personal reasons. I’ve never been a big bread maker. I go through phases, which have included both my bread machine and my two wood-burning ovens out in Todi. But they are phases. I am not one of those people who have a sour dough starter in the fridge, and make different kinds of bread each week. So, while I thoroughly enjoyed last week’s bread class, and learned much, it just isn’t my passion.
Pizza, on the other hand, is something I can and do get very excited about. I make it all the time at our house in Todi, and eat it more often than I should here in Rome (including, naturally, Bonci’s own at Pizzarium) . So the chance to get tips from Mr. Pizza himself was thrilling.
I plan on writing up a few posts to share all this pizza wisdom. Today’s is all about the dough.
To explain a bit. The pizza that we learned how to make is not the round, single serving pizzas made in a wood burning oven. We learned how to make Pizza al Taglio, a pan pizza usually baked in an electric oven. In Rome you can stop by places that specialize in this type of pizza (Pizzarium being the best in Rome) and buy slices by weight. Bonci taught us how to translate the huge trays of pizza that the shops make, with professional equipment, into our own home kitchens.
A few Bonci points to keep in mind:
The Flour: The quality of the pizza depends on the quality of the flour. (duh!) Always try to use flour that is organic, untreated and preferably stone-ground. Since these flours are living things, store them in the fridge. The flour that Bonci recommends (and the one that I’ve been using for years) is from Mulino Marino. (It is imported to the States and you can get it at Formaggio Kitchen). In Rome, it’s becoming more readily available and you can find it at Pizzarium, Domus Birrae and La Tradizione. (And the cute guy helping Bonci in the video is Mr. Fulvio Marino himself, down from Piedmonte for the class)
Yeast: For home baking pizza Bonci says use dried Lievito di Birra. (you can certainly use a starter, but for better results at home, he recommends dried).
Rising: It is important to let the flour ripen over a long period of time. Rather than a few hours at a warm temp, better 24 hours in the cold. This gives the flour time to ripen and so final pizza will be lighter, airier and easier to digest.
IMPORTANT NOTE: Bonci kept repeating, over and over and over, that the recipe was really only about 10% of the success (or failure) of a pizza. It was all in the handling of the dough, in the manipulazione. And in fact, the pizzas we made the first evening, before we knew what we were doing (with dough that has been made in advance by the master himself) came out flat and sad and burnt. But once we all learned the trick of handling the dough – or rather not handling it too much – our pizzas were light and fluffy and something we could be proud of. So, watch the video. Then watch it a few more times.
The recipe: Pizza
1 kilo of flour (tipo 0 or tipo 1 – Burrato from Mulino Marino)
700 gr. water
40 gr extra virgin olive oil
20 gr sea salt
7 gr dried yeast
Mix the flour, yeast and water in a large bowl, using a spoon. When it is almost mixed, and the lumps are mostly gone, add the salt, and then the oil. It will seem very wet. Don’t be scared. The wetter the dough, the better.
Flip it out onto a lightly floured surface and knead it gently by folding the dough in half, over itself, towards you. Grab the dough by the two corners facing you, and pick it up like an envelope, and turn it 90 degrees, and place it back on the floured board. Repeat this motion a few times, without really kneading the bread. Fold and turn, fold and turn. It will seem very sticky at first, but when you get the hang of it, it gets easier.
Place the dough back in a lightly oiled bowl, and let rest another 15 minutes. Do this 2 or 3 more times. This is the step that Bonci calls ‘regenerating the dough’. Don’t over knead. In fact, don’t knead at all. By the 3rd time the dough will be springy and not sticky.
When this is done, place back in bowl, cover very tightly and let rise in fridge for 24 hours.
Take out of fridge and let come to room temperature.
Preheat oven to the hottest setting it has. 250c/480F
Lightly flour a board and follow the steps in the video below to get your dough into your oiled pan. The important thing is not to be violent with the dough! (My friend Judy got yelled at in class for being too violent). In fact, the first day we all over-worked our dough and ended up with flat pizzas that cooked unevenly and even burnt (yes, that includes you Judy). What you want to do is be very gentle, massage the dough, and seek to retain the pockets of air that have formed over night. The video below has my voice-over, so you can follow in English. But I’ll post the original Italian at the end of the post, because following Bonci directly is so much better, if you can follow the Italian. I can’t stress how important this part is to the success of the pizza.
Don’t worry about fancy toppings at this point. The next post will discuss toppings. For now either top with tomatoes (pelati, with a bit of oil and salt added) or else just with olive oil and salt.
Place the pan on the bottom floor of your oven. Each oven will bake differently, so you have to experiment. If you have an oven stone, all the better. It is important to get your oven as hot as possible.
After the pizza has baked about 15 minutes, check to see if the bottom is baking. (take it out, and lift up the crust to take a peak underneath. If it seems like it’s almost done, move it to the center rack and bake until finished, about another 10 minutes.
Take out of oven and remove from pan immediately to let cool on rack.
At this point your pizza is ready to either eat or top with other ingredients (next post).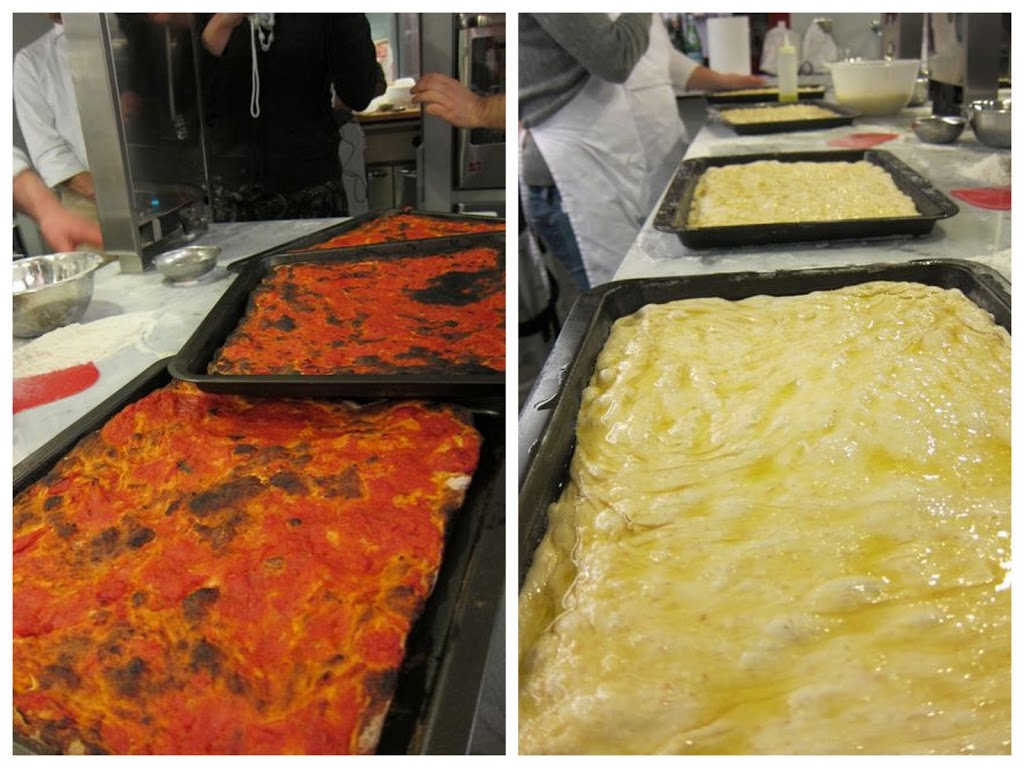
LEFT: Sad Pizzas from Day One. RIGHT: Better Pizzas, ready to go in oven, Day Two
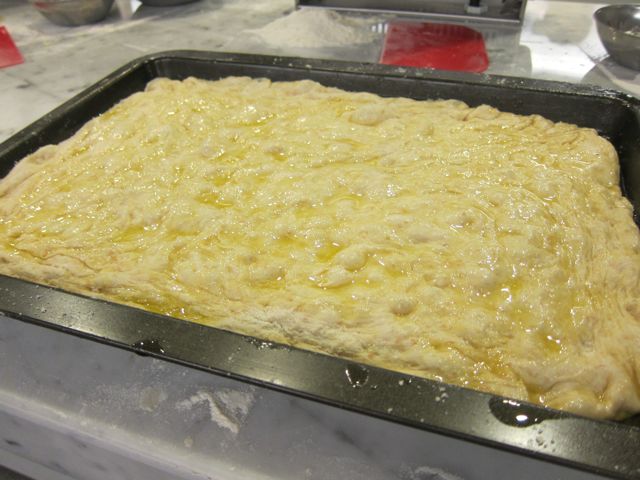
M pizza dough, Day Two. Notice how I’m now able to retain all those precious air bubbles?
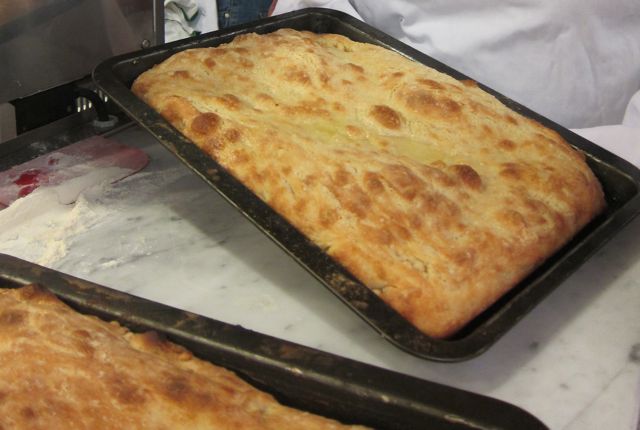
Day Two Pizza: much fluffier and lighter.
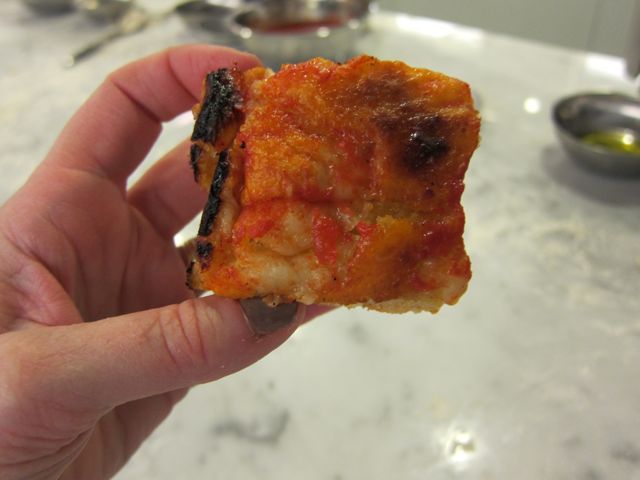
Yum. I have to try that technique, even if I like my pizza very thin and crusty. However, this would be perfect to make pizza bianca.
We love this post-reportage-recipe Elizabeth!
Great post- so much excellent information here for those who want to make pizza at home! Love the photos too- they are mouthwatering!
Meraviglioso post cara Elizabeth! Anche i video hai caricato bravissima!
Good Job!
Only had the opportunity just now to look at the video and the technique is incredible. Thanks for capturing this.
Natalie: I like thin and crispy too, but this is really great, when made well.
What a revelation to discover you on Fb in the fabulous photos of the Bonci a rama pizza extravaganza. Even better to discover what a delightful blog you have as well. I look forward to discovering you and your adventures here again. Love the photos, to repeat the above sentiments. Brava!
Thanks Bella Baita!
A wonderful post. Thank you. Can you describe the crumb of the finished pies? Was it filled with larger, irregular bubbles, or was it more tightly uniform – like a sponge?
John: More spongy. I actually have a few photos that would show you exactly. If you send me an direct email, I’ll send one back to you.
Elizabeth,
I really enjoyed your post. I also was wondering like John how spongy your finished crust was. I am also trying to make this kind of pizza and have been a little successful, but I found the video very informative.
Did you learn that the dough in the pan needs to be proofed or do you proof the dough at all after it is balled?
Sorry to be asking all these questions.
Thanks again!
Learning Pizza Maker: thanks for the comments!
When we made Focaccia (which I haven’t written about here) the dough was left to rise in the pan. Instead, the pizza just proofed after it was balled, then put in pan and baked.
Elizabeth,
Thanks for telling me when the focaccia was made then the dough was left to rise in the pan. Would you mind sharing what the difference is between focaccia and pizza in teglia? Does the pizza in teglia have a more open crumb structure? If you have any time could you look at my blog and see if you think I came anywhere close to a pizza in teglia? The picture of the crumb should be at the right, first picture. http://learningknowledgetomakepizza.blogspot.com
sono Paolo da Lecce vorrei sapere l’indirizzo del ristorante pizzeria di Gabriele Bonci a Roma ok grazie
Ciao Paolo da Lecce. Pizzarium, Via della Meloria 43.
E chiuso per momento, ma deve riaprire fra 2-3 settimane.
Sorry, I must have missed it, but at what point do you add the yeast?
Thanks for generously sharing all these marvels!
Linda: Thanks! I left out the yeast, thanks so much for the catch. Have fixed it.
Hi Elizabeth, Just a couple of questions, first when is the yeast added? I didn’t see it in the recipe; also the recipe calls for 700 gr. of water. I don’t recall seeing water measured by weight before (I live in the US).
Thanks for clarifying.
Marco
Hi Mark (Marco) yes, I know that’s confusing. In my figuring, when I weighed it, it was 800 ml.
I have followed this to the letter and watched the videos but it hasn’t turned out right. After it has proved overnight in the fridge do I just empty it from the bowl then stretch out and bake?
Or does it need to be split into balls and proved further?
Thanks
Hi Stuart, and to the various other people who have written to me directly. A lot of you report having trouble with this recipe. As you know, I too tried it at home, and it was a failure – but I thought it was due to my expired yeast.
I am going to try again, but I’ve also written to Gabriele’s assistant Elisia, to see if she can shed some light.
Thanks for your patience…all a learning experience!
Liz, Thank you for this excellent post! I am enjoying the pizza as I write. MLR
Wow! MLR, very impressed you are visiting my blog…xxx
Hey, nice site you have here! Keep up the excellent work!
Pizza Equipment
These folks over at pizzamaking.com have been working at this. They find their groove around page 15.
http://www.pizzamaking.com/forum/index.php/topic,9989.0.html
PS I found your blog from that thread. 😉
Thanks for the update!
Thanks for this information and the video link. I love Roman pizza al taglio better than any other kind (Pizza Florida in Largo Argentina is a favorite). I have always wanted to figure out how to make the crust. Your recipe worked fine with all-purpose King Arthur flour and Fleischmann’s dry active yeast (couldn’t easily find the Italian stuff at reasonable prices in suburban Texas). I found the crust cooked in about 10 minutes at 500F on the bottom rack with olive oil only on the top. Developed a dark brown crunchy bottom. Then I added ingredients at finished another 10 minutes in the middle rack at 350F. I did find the texture to be airy, but slightly biscuit-like rather than chewy like the standard Roman al taglio. Not sure how to adjust for more chew but will keep experimenting.
What a wonderfully illuminating post. Thanks! I can’t wait to put it all to work.
Let me know how it turns out.
If only it tasted this good at home!!
With practice, my dear, with practice.
Sounds wonderful.
Ma una domanda – Elizabeth, does one need a decent level of Italian to attend his classes, or can one still learn a lot from observing him?
I met Bonci briefly at Open Baladin the other day, by chance, when I started discussing bread with one of the bar staff – they gave me some of his bread, my first taste of it. Delicious. He was around as he supplies their bread – and presumably appreciates their beers!
Would love to learn some of his techniques, but I worry my Italian’s too rudimentary.
Well, Italian certainly helps! But there is such a huge request for him to do the class in English, I’m wondering if you could organize some other friends to do the class as well, then hire someone to translate.
Thanks Elizabeth. TBH, I don’t think I have enough English-speaking friends here in Rome for that to work. I just need to keep improving my Italian!
How many pizzas can you make from the dough. Love Bonci pizzas, they are the best.
Nina
Thanks for all the great posts about Bonci.
When you say: “Place the pan on the bottom floor of your oven”
Do you mean on the lowest tray ? or really on the bottom floor without tray ?
Thanks again
Gilles
Really on the bottom, on the floor of the oven.
Thanks a lot for your answer.
I have read also that some people use 80% of water in their “Bonci” recipe, whereas you only use 70%. What would be your recommandation ?
Last question: do you need to let the dough rise in the pan for some time before you cook it?
Thanks again
BTW you really have the best blog in terms of informaton about Bonci pizzas 🙂
Massage the dough! Well that it explains it! I have been a very violent pizza maker all these years!
Grazie Mille!
Hi Elizabeth, I see the one question above concerning the use of grams as the unit of measure. I see that you say the 700 grams of water was about 800 ml almost 3 1/2 cups of water. And the yeast? NT Times cookbook conversion table says 7 grams of dry ingredient(the yeast) would be .25 oz and 20 grams would be .70 grams (but olive oil is not a dry ingredient). Sorry to be fussy and Yes, I did see that it isn’t about the recipe…but the technique. Just wondering why give both dry and wet ingredients in grams and have you done a conversion yourself into cups and teaspoons since trying at home. THANKS! Lucia
Hi,
How many standard round pizza bases will the above recipe make? Greetings from Australia! 🙂
Thanks
Greg, I halved the proportions for a first time experiment, and in a 30cm diameter pan it ended up about an inch thick when done. Very nice dough, and it cooked beautifully. Hope this helps.
PS – I assume we both ended up here via the recent article in the SMH…?
Ha.. yes indeed! What flour did you use? I found some “00” flour from harris farm which will hopefully work well.
So if i used the full measurements, do you think i could get 3 or 4 balls to make thinner bases?
Greg – Yeah, I think full measurements = 3 to 4 x 30cm round trays.
Now I’m just quartering the amount for one base.
Initially, it was just some surplus plain flour sitting around. Next time, strong (high protein) flour, stoneground but 100% wholemeal. Bit heavy & didn’t rise too much. This time, 80% Lighthouse brand pizza/bread with 20% of the stoneground wholemeal. Check out what the Lighthouse website says about “00”…it’s not necessarily always the high protein flour you want…
Hi there, I saw your video a year earlier and I went on to check on others videos like the ones from Massimo Bosco to try to get some answers to my questions. However, I did not get to much luck. These are my questions, if you don’t mind, Bonci uses Rome type of dough (l’impasto alla romana). Did he use the paddle or the hook to make the douhg? How many type of flour did he mix in the dough? What was the water temperature in the dough? how long did he keep kneeding the dough and how long did he let the dough to rest, and finaly, what was the temperature of the oven or ovens? I took a course at la scuola di pizzaiolo back in 2008 but they show us only the dough for pizza napolitana. However, this dough ( alla Romana)is much better. Thanks. [email protected]
Lots of questions! This dough was made by hand, and is meant to be a way for home cooks to recreate the dough he uses in his shop, Pizzarium. For all the precise details I’d recommend you buy his book, which is about to be published in English, by Rizzoli USA.
Hi there,
Thanks so much for this video. I’ve been looking for a good recipe to recreate this kind of dough for ages. One quick question: Formaggio Kitchen seems to only carry Mulino Marino’s Tipo 00 and Tipo 2. Which would you recommend if we can’t get type 0 or 1?
Thanks again!
Thanks for the video with kneading instructions. I checked Formaggio Kitchen, but the flours are not organic. Is there an online source for organic typo 0?
Thanks!
The videos are brilliant as are your photos – many thanks for posting. Found you through Rachel Eats…
Being a pizza lover, I am always looking for insight into perfect pizza. I am a big fan of pugia-style focaccia, and was originally introduced to it on “Cooking with Nonna” website. It is some what the same as this recipe, and is very good as well. The difference is that the dough rises in a deep dish pan with lots of oil, and it is very simple, using only fresh tomatoes, and only made when the tomatoes are in season.
Thanks for your site it is a treat to read and look at.
meant “Puglia”-style
Hi,
How much dough did he put on the sheet ?
It looks like at least 500g
Any idea ?
Mmm……I think it was about 500 gr., but I’d have to check. It’s definitely written in his book, but as I recall it was about that (1 pound)
Hi Elizabeth! I am just going through your posts and this is awesome!! I am married to an Italian and want to make this pizza recipe for him but we are currently living in the UK and was wondering what I can substitute the dried lievito de birra for here in the UK?
I foundthe flour type 0 here. Hope that works as well.
Thanks!
Glad you found it, but not sure what the UK equivalent is. I’m sure if you google it you’ll come up with the correct substitute. Good luck!!
Hi elizabeth! Thanks so much for sharing the recipe. Do you know if this dough can be made in advance and frozen?
Thanks
Yes, just take it out and let it rise at room temp
Hi Elizabeth!
Do you know the professional recipe for this wonderful Pizza?
Thanks for sharing!
I just made it. Thank You so much for your Video an Article. 1st Time. I’m Italian an I’m making pizza this way from now on I love thin crust. It came out great 🙂
Fantastic!!!!
Hi Elizabeth – what a lovely article! I have a quick question re the Flour. I can only access Mulino e Marino Burratto type 2 or their ogranic type 0 flour. Which is closest to the one Bonci uses and that you would recommend.
Thanks,
Ravi
Frankly either will probably work. It’s as much about the rising and the handling of the dough as it is the flour. I would buy both, and experiment yourself.
We were just in Rome and fell in love with Pizzarium. Thank you for posting the recipe. One question, how big is the pan?
Hi Elizabeth – for this style of pizza, what would be conversion to instant dry yeast? I also think fresh yeast could work. Active dry yeast (Caputo, etc) isn’t readily available here
Thank you,
Steve
I usually use fresh cake yeast.
Thank you! I’ll give that a go.
Hi Elizabeth,
I made this recipe to the T, with the exception of cutting the recipe in half. The dough was wonderful to work with, although very sticky at first but after folding and kneading the dough had great strength and elasticity. I am a experienced sourdough baker, so I added more water to my dough initially as the 70% hydration level was too low for my flour in the cold and dry Canadian climate that I live in.
Everything went well according to plan but the biggest mistake of the night was the pizza getting burnt! I cranked my oven to 500F and placed the baking pan directly on the oven floor, set the timer for 15 minutes and went to do something else in the kitchen. At 5 minutes the dough rose beautifully, like a fluffy pillow with its arches and valleys. At 12 minutes my oven started to smoke and things went downhill from there. I knew I should’ve checked earlier but that’s what being unassuming gets you. The pizza still tasted delicious as we scraped off the top layer and ate whatever we do could.
Thanks for the wonderful recipe, I will be making this many times over but with adjustments to the heat and cooking times.
Oh so sorry you had a near disaster! Each oven is different, and you have to watch them carefully. Making pizza in the oven is a learning curve for sure.
Hi Elizabeth…thanks for such an excellent and timeless post…some of us in America unfortunately are just now discovering Bonci, but as I said, the information is timeless. It’s a little hard to tell from the video the pan size he is using…looks like it may be a half sheet pan?
Hello,
I just discovered your site and am in the process of trying your recipe out.
One thing I am concerned about is the “original” Bonci called for a 72 hour ferment. Here it’s been reduced to 24 hours.
Can you shed some light on this as to why the fermentation is cut back?
Thanks
Chris
Because not everyone can schedule a dough that has to rise for 72 hours. 😉